Prep Work
Corners, Stanchions & Sizing
I'm a little tardy writing this post. As a matter of fact, the tasks covered in this post were actually completed back in May or June. But it's finally time to get started back into the bathroom now that the humidity has finally subsided. I really want this project done so... let's get at it!
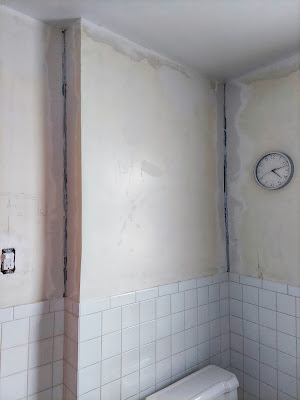
Catching Up On The Corners
So one of the annoyingly endearing features here at 173 is that the house was built right on the cusp of the great depression and the stories go that much of the house was built by day-workers who may or may not have been carpenters or tradesmen. And that's kind of easy to believe because I don't think there's a single square corner or plumb wall in the entire house.
Houses, like people, are apt to become rather eccentric if left too much on their own; this house was the architectural equivalent of an old gentleman in a worn dressing-gown and torn slippers, who got up and went to bed at odd times of day, and who kept up a continual conversation with friends no one else could see. - Susanna Clarke, Jonathan Strange & Mr Norrell
As a matter of fact, some of the door frames are at such odd angles that they're actually noticeable. The weird thing about me though is that I like this kind of eccentricity in the house so I've made very little effort over the years to correct those things.
It wasn't hard to install it, and even the worst of the corners in the bathroom actually came out pretty good! Now, that task is done, and it's time to move on to the next stage.
The bathroom is the one room in which we are able to finally switch off from all that is going on around us and simply be alone with our thoughts, and reflect on the day. A chance to relax and wash life's little stresses, and above all, where inspiration strikes. It's an experience! - Edward Lewis
Stanchions
With the bathroom remodel of 2002 we put in some glass shelves, towel racks and the like. They really fit in with the spirit and the feel of the original bathroom with white tile and chrome like you see with the sink faucet.
And as you can see in this next picture, these accessories had white ceramic-looking stanchions with chrome parts, and they really look great in the bathroom. The problem is that over the years since the original remodel, they've kind of gotten discolored a little bit and lost their shine and looked more plastic than they did ceramic, so it was really time to do something about that.
I put a little thought into how to address the stanchions and came to the idea of just cleaning them with some acetone to take the gloss off and then spray painting them.
I just took the shelves apart and the towel racks apart and removed the metal parts from the stanchions.
Then I just used my painter's points to hold them up and with a little bit of Krylon Gloss White and spray painted them in just a couple minutes time.
They came out pretty good and when we finish the wallpapering and all the other parts fixes, and we start reinstalling the shelves and towel racks you'll really get a good look at how they turned out. For now, here's a little picture of how they look except the lighting is pretty bad found in that part of basement, so the red and brown paint is reflecting off the drop cloth. The bright white will show better in better lighting!
Sizing
Finally, the walls were painted with what is called wallpaper sizing. In this case, sizing is not the act of measuring a wall, rather, it’s a method to prepare walls for wallpaper.
Most commonly, wall sizing is diluted wallpaper adhesive applied to the wall before installations, although there are commercially prepared sizings, which is what we used.
Sizing’s main purpose is to improve adhesion and to stop the wall from absorbing moisture out of the adhesive prematurely, allowing time to position the wallpaper before it dries.
Some tools restored using 173's signature red!
∙ The Bridgeport Tomahawk Jr. crate tool restoration - January, 2023
∙ Miti-Mite base with lamp restoration - November, 2022
∙ The inherited breast drill restoration - October, 2022
∙ My hand-cranked bench grinder restoration - January, 2022
⎯⎯⎯⎯⎯⎯⎯⎯⎯⎯⎯⎯⎯⎯⎯⎯⎯⎯⎯⎯
Here's a bunch more signature red projects!
And That's Where We Leave Off
So a number of prep tasks are done. Now - time to get onto the wallpapering! [Little Secret: I'm a little behind on posting and the wallpapering has already begun!]
Thanks so much for stopping by and taking the time to read about House 173! As always - see ya' next time!


