Outdoors
Non-traditional Fun!
The story behind this post runs back about 25 years ago and involves sewers, sinkholes and sidewalks. For us here at 173, it was a time relative frugality, and unexpected major repairs were slightly anxiety producing. The fun thing about times like that is several interesting decisions were made, one of which remains to this day! Let's get into it.
Once Upon a Time
Before we get into what the front walkway looks like these days, let's go back to a time long before we came to 173. If you've been hanging around here for a while, you may remember that before us, the Moshers lived here as the original owners since 1926 or 27. As a matter of fact, here's a picture of some of the Mosher children on the original front walkway back in the mid-70s.
Very traditional, with that classic look. And here's a shot taken sometime in the first few weeks after we arrived.
And this is a shot probably within months of the sewer pipe episode that changed everything. Keep reading, it'll all make sense in a minute.
I am interested in the gaps between one piece of sidewalk and the next. I am interested in the things for which we don't always have a name, and the things that are not easy to articulate - the difference between what we think and how we feel. - Amy Bloom
Why it All Changed
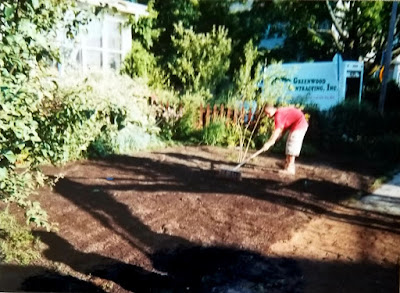
Not long after purchasing 173, I was mowing the front yard and noticed a little divet in the yard next to the sidewalk coming from the front door. I didn't think much of it at the time, but it did register. Maybe a year later, I noticed the divet had become a depression, and still later a bit of a hole. Then, somewhere around '99 I noticed that the hole really had become something of note.So I called the City and they sent a crew out to scope the city sewer line. What they found was the sewer line that comes from 173 to the city's line had dropped off the sewer main. Which, of course, meant there have to be some digging in the front yard. As you can see, the digging was considerable. You may also note the original walkway on the right.
Ultimately, the walkway and the whole front yard were torn up. Just the cost of doing business I suppose.
The upside was... it gave us an opportunity to make choices we hadn't previously considered!
New and Different
This is where the mention of frugality comes into play. Back when the sewer pipe had to be replaced, careers were still in their infancy and, while we lacked for nothing, we had to be careful and smart with money. That said, after I told the guys we didn't want them to replace the walkway, we had to figure out what we wanted. A couple things were certain... it couldn't be a straight shot across the yard and, we wanted stone. Problem was... that much stone wasn't in the budget. Then one day I was at Home Depot in the concrete section and I came across a concrete stamp in the shape of stones. Perfect! So I grabbed one of those and a bottle of a tan-colored concrete dye.
This stamping form is a plastic mold, and here's how you're supposed to use it. First, you clear the area where you want to create the walkway and level the ground. Then you pour the concrete into the mold. After the concrete sets, you remove the mold and repeat the process to create the desired length and pattern. Easy peezy lemon sqeeezy right?
If you're reading this...Congratulations, you're alive.If that's not something to smile about,then I don't know what is. - Chad Sugg, Monsters Under Your Head
Probably, but....I didn't do it that way - of course. I'd like to say I didn't do it that way because I had a better idea but quite frankly when I went to use it I really had no idea how it would work. So I did what I thought was the best way to go - I laid down two 4 foot by 8 foot pieces of plywood and made all the stones I would need in the molds. This may seem like pretty much the same idea but instead of doing this in the space that I wanted to put the walkway, I ended up putting the stones in place separately. Laying them individually like they were real stones broke up what would have ended up being a pattern if I had done it the"right" way. So now the walkway has a more random-looking layout. And by the following summer, the grass had grown in...
...and the walkway was becoming just part of the landscape!
And of course, 173 has continued to evolve over these past couple decades...
A Minor Repair
As I mentioned a couple weeks ago, I had noticed a depression develop at one end of the walkway caused by the ground settling. To fix it and widen the path a little, I needed a few more stones. Out came the stamp and concrete dye.
With a little soil and leveling sand, and an hour or two monkeying around with levels and trowels, the walkway was good as new!
It's a Wrap
And that's the story of the non-traditional walkway at 173! Ishould also mention that this was the first repair the walkway has needed in 25 years... its really held up well. Anyway, the grass had already begun to grow between the stones again, and in a few more weeks it'll all look good as new!
Hey, thanks for stopping by! See ya' next time.


