Porches
South Wall Install
Now that the window sill for the south wall was sorted out, it's finally time to get it done! Time to put the sill and the baseboard(?) in place and get the siding done. Let's give ut a go!
Final Sill Prep
When last we met, I had made a new window sill that would go under the two windows on the south wall. I also filled all the little flaws, the small knots, and the marks left from my, "Happy little accident." So the next stop was simply taking the sill outside and give it a good sanding.
I also wanted to get the first coat of primer on it before installing the sill. Because the south side of the house gets the sun all day I invested in a quart of very high quality oil-based primer from Sherwin Williams.
I'll probably put at least one more coat of primer on it before painting, but in the meantime, I went ahead and installed the brand spanking new window sill.
Baseboard(?)
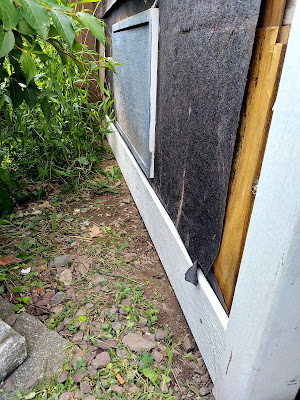
The next step was to put the bottom board. I'm not sure if we call these baseboards in this circumstance or not but for the rest of this post that's what I'll call them. Back when I originally put the cedar shakes on the back porch, I used a pressure treated board for the baseboard which worked out well all these years.
A dream doesn't become reality through magic; it takes sweat, determination and hard work. - Colin Powell
Siding!
So at long last - at least it seems like it's been a long time coming, in fact, if you count all the years that I should have already done this project, it really has been a long time coming.
Nonetheless, at long last the time had come. The first step was to put in the starter starter piece.
Because of the location of the access panel where you can get underneath the porch, the first several rows were tricky. They took a lot of measuring and guessing but ultimately it worked out.
SubHead
While it may have taken a professional an hour or less to put the siding on the south wall, it in fact, took us approximately 4 hours to do it. Nonetheless, it's up! If you take a close look at this picture, you might notice it looks like some of the rows are a different color.
When I was young, summers stretched so long, as if they'd never end. Days were like marathons of time, riding bikes until my blisters had blisters, endless energy, and not an actual care in the world aside from when 'Paul' could come out and play. Days now feel more like minutes, almost game show like. - Mark Brand
But these rows were from a box opened back in 2016 and stored under the porch and had just gotten dirty. We didn't take the time to clean them yet, but we'll pull out the pressure washer and give it a good cleaning and it'll all look brand new. There's a small punch list of details to do but they'll come when the east wall is done. It's exciting to have the siding up on the South wall and we're well on our way at this point in this project!
It's a Wrap
Some of the plants next to the house took a bit of a beating today. But they'll grow back. I should also point out that Cyd actually had to be moved just to make it easier to work in that space. I gotta tell ya' - he's heavy! We had to do the crab walk thing with him to get him out of way and put him back in place but, there he is - still guarding old 173.
That's it for now. Next we move on to the East wall! Hey, thanks for stopping by - see ya' next time!


