Back Porch
Window Trim
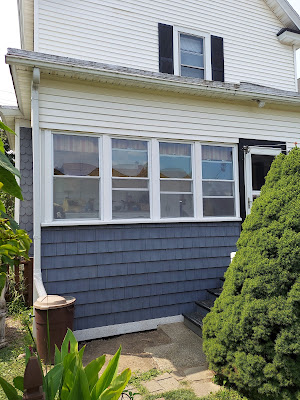
We're really coming down to it now it seems! All the siding is up, the band boarding is in and we just need to put the trim up around the windows, then it's just punch list items. It's exciting to see it all come together and, while it's not an overly obvious change to the casual observer, this project on the back porch has really given 173 a much more "finished" look. Let's get into it...
Where We Left Off
Last weekend we left off with the siding on the East wall completed and a bandboard added to the bottom of the wall. At that point we started to get that feeling that we're getting close to finishing up.
The Supply
When it came time to figuring out the materials to replace the trim around the windows, I was faced with a couple options. Initially I thought I would buy all new PVC boards to replace the old ones.
But then one evening during the week, I was looking at the old PVC boards and realized there really was no need to replace them. They just needed to be rehabbed, cleaned up and, in some cases, made longer. I know, I know... just keep reading!
Supply Problem and Solution
Once I decided to give the old PVC boards a second chance, the first thing I did was clean them up really good. First I gave them a good scrubbing with just soap and water. Then I cleaned them with some Simple Green.
Because the window sills had changed, I had a sneaky suspicion that the length of the boards might be an issue. So I went out and measured all the windows to get a sense of how long each board would need to be because, oddly enough, they weren't all the same size, although the windows are the same size. And I just don't understand. It's f$%#@&$ geometry...so leave me alone!
After measuring and dry-fitting the boards, I measured their actual length so I could figure out if any didn't need to be cut or, like I mentioned earlier, maybe made a little bit longer.
I know that last sentence sounds a little crazy. How do you make a board a little bit longer? Well, much the same way that I made a one-piece window sill for the East wall by marrying 2 boards together. In this case, I had heard great things about Titebond's PVC glue. So I took some scrap PVC board and cut out a couple blocks to add to a couple of the boards.
I used to hang out in my dad's workshop on weekends. Later, when I was starting out as an actor, I became a roofer and a framer to make money. But what I really enjoyed was the finished work. I like the longevity. - Mark Harmon
In so doing I didn't need to buy new boards, which wasn't a problem financially, it just seemed silly to go out and buy brand new boards when these were perfectly fine. And while it turned out I only needed 2 of the boards to be elongated, the PVC glue didn't work at all so I ended up clamping two of the boards down to a sawhorse and just put a few nails through through the end of the additional block. After that, I could just sand the end down with my orbital sander to bring them to the actual size that was needed. That took a couple of minutes on each one, but it was well worth the effort. By the time all the caulking and painting is done you'll never even know the difference.
Prep
Once all that was done I decided to cut the bottom of the boards at roughly the same angle as the window sills so they would sit on the window sills neatly. I used my little digital angle finder, then ran the boards through the table saw. And we are off and running.
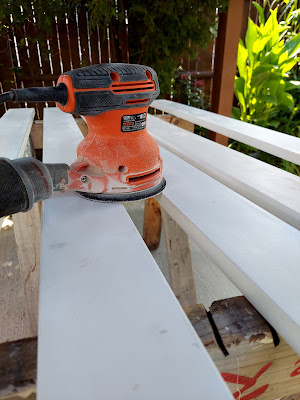
Once outside, I used my random orbital sander to give the boards a quick sanding down. Number one, to make sure that they are good and clean.
Number 2, because we're going to paint these boards after they're up, I thought it would be easier to kind of degloss them and give them a little bit of teeth for the paint to bite into.
Trimming!
Finally, the time had come to start putting the trim on the windows. I used my nail gun, a level and a ladder, and that was all the tools that was needed to get the windows trim in place.
I'll have to look through the blog to see if I've ever mentioned it before but, I love that ladder stabilizer on the top of the ladder, it's really been a game changer. Even though this ladder isn't very tall, it holds the latter out away from the house, and gives the ladder a lot more stable feeling.
Done!
I think this part of the back porch project of 2024 only took about 3 hours, I suppose, which isn't bad. Although I think it's another one of those things that a professional could have had done in maybe, you know, 45 minutes to an hour.
But it was another beautiful day and it was great to be outside working on ol' 173.
Hey, thanks for stopping by - see ya' next time!


