Porches
The Decking
When last we met, work had begun on the back stoop, and I had been stung by a bee. But since then I've recovered from the cellulitis caused by the bee, which I think really was an unfortunate accident as opposed to an intentional thing by this particular bee but, I suppose we'll never know. Nonetheless, time had come to get started on the decking of the back stoop. Let's get into it.
The Material
When I realized it was time to do another renovation of the backstoop, I started taking a look at what options we had for the decking. But when it came down to it, we really needed to go with what we already had, which was these rabbeted boards that overlapped one another. This was important because this system keeps the storage space dry under the stoop.
Staying with the same style we already had, the first step in replacing the decking was to pick up some 2x6's. This project would require no fewer than 11.
Setup
For the first time ever, I carried my table saw outside to work on a project. I rightfully figured there'd be a whole lot of cutting, and with 11 boards I just couldn't see bringing them up-and-down from the workshop. So, we set up in the driveway under the car port which made the task much easier.
Human knowledge is dark and uncertain; philosophy is dark, astrology is dark, and geometry is dark. - John Jewel
And as you can see in this next picture, we generated a mountain of sawdust. I can't even imagine the mess this would have made in the basement and all over the workshop.
The Joint
Aaand...this is where geometry came into play (again). All we had to do was to cut rabbet joints into opposing corners of each board. Very, very simple...right? But I can must report that it took us an inordinate amount of time to figure out the geometry of the simplest of all joints.
...to make another pass in the joint.
It took a couple hours to make all the cuts in the boards, but eventually we had a pile of "customized" decking.
Out with the Old
After getting stung by the bee while removing the first boards in Part 1, I thought our works take some considerable prying on the remainder but they all came off with a tug or two...in maybe two minutes!
Here's another angle. Notice anything?
Yup - the joists (as it were) are laid out flat, but I suppose it's okay because they've late at least 30-plus years. But the real interesting thing is the hardware holding the joists in place weren't nailed down. Again...30-plus years, so... heck, I put a couple roofing nails in the brackets anyways!
Then, as I did with the stair stringer back in 2016, I topped the face of the joists with tar paper.
In with the New
Before getting into the installation of the newly fitted decking, I thought it interesting to point out how the old decking had been affixed to the joists. The screws had been set in the corner of the rabbet joints, and also through the joists from underneath! Brilliant! Totally concealed fasteners.
But in our case, we decided to go the direct route... straight through the top. Of course, we took the time to lay out some lines so the screws would make nice rows.
And I went to some length to try not to sink the screws in too deep so as not to leave divets for water to sit in.
And fairly quickly, the back stoop at 173 had new decking!
Working the Details
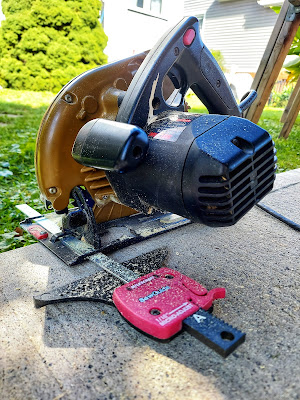
The first detail attended to was trimming the ends of the decking. A little chalk, a straight edge screwed in place, and my ol' circular saw made quick work of that.
Clean as a whistle (whatever that means!).
Several poets and authors have described taken creative license to describe both cleanliness and a whistle, so the phrase’s origin may be rooted in the literary world. Some of the poets and authors have used words like pure, clear, sweet and dry to describe a whistle. This could be related to the fact that the tube of a whistle needs to be both clean and dry in order to produce its sweet, crisp sound. With many examples of these usages in older novels and poems, the meaning of the phrase in this way could have become commonplace in oral communication as well. - Steven Ip, Cleanzen Blog
I used my largest roundover bit, and with my 2hp router it made quick work of it.
The setup took a few minutes, but once everything was in place... it took all of 30 to 40 seconds!
Of course there's sanding and other details to address, but now it's time for putting the posts for the railings back in... we're getting there!
Hey, thanks for stopping by - see ya' next time!


.heic)


