Porches
The Punch List
In our last post we had finally reinstalled the railings, many of them new because of the problems we pointed out early on in this series about the fungus growing on the old railings. With the flooring done and the railings back in, it was time to get to the finishing tasks, including sanding and painting and all the little punch list items. This won't be a long post and probably not particularly interesting, but this will finish off a summer-long project. Let's get into it.
Prep
With the railings up, including new wood on the East Side of the stoop, it was time to get started on the prep work for painting. As you can see in this next picture, the new railing boards were bare and not pressure treated so we knew we'd have to paint to protect them from the weather.
But the quality of the new boards was really...bad. They were straight, with just a little bit of twist, but boy-o-boy, the surfaces were really rough. So I spent a lot of time putting wood filler on so many areas!
After that, and after the sanding was done, it was time to caulk. I focused on the spaces where the boards meet the posts. I think this part of the prep took maybe half an hour.
Gratitude unlocks the fullness of life. It turns what we have into enough, and more. It turns denial into acceptance, chaos to order, confusion to clarity. It can turn a meal into a feast, a house into a home, a stranger into a friend. - Melody Beattie
Painting
Of course, the railings would be painted white, just like they have been since the initial remodel. However, when I went down to look at the paints I had available, the only exterior white paint I had was Valspar's Polar Star.
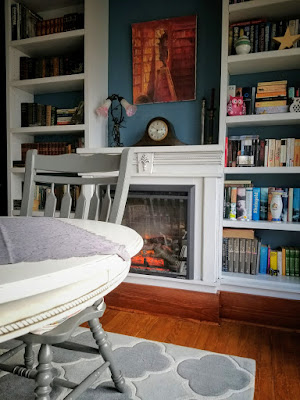
I learned this with the very first dining room project - the dining room table. It's such a nice shade of white (gray?), I used it on the table, the hutch, the built-in, the radiator cover and a plant stand! It doesn't have quite the brightness of the pure white used on the window sills on the back porch, but it's certainly white enough and really...you can't even tell that it's technically gray.
And, just like with the caulking, the painting of the railings took probably less than an hour, including clean up so just like that, it was done. But then again - not quite....
The Hook
When we moved in to 173 back in '97, there were a number of things that we inherited from the Moshers. They're mostly small things here and there. One was a bunch of those old school wire coat hangers. And even though they're not fancy, we've made use of quite a few.
A couple years ago, we were looking for a hook for the back stoop that could hold a basket of clothes pins, because here at 173...yes, we do still sometimes use the clotheslines to dry clothes from time to time. So, I pulled out one of these school coat hooks and just screwed it into one of the railings and it worked perfectly. Now, with the back stoop remodel, I thought I'd give the old coat hook the same treatment I give old tools when I'm restoring them. I put the hook through a rust remover bath and then a few minutes with the wire wheel on the bench grinder. The hook came out looking pretty much like it would have when new.
Just because I had it available, I painted the hook with Rustoleum Oil Rubbed Bronze spray paint just to keep it from rusting again.
And now 173 has probably the fanciest old-school wire coat hook clothespin basket holder. At least in this neighborhood!
Some other projects painted Polar Star
✤ The Dining Room Table - February 2015
✤ The Radiator Cover - January 2019
✤ The ReStore Hutch - July 2015
✤ The Plant Stand - March 2016
⎯⎯⎯⎯⎯⎯⎯⎯⎯⎯⎯
Oh, and one more... the Dining Room Built-In
Finally - Done!
And with the, the entire summer long back porch project is complete. Of course, I say complete but as you can see in the picture below, the deck will need to be stained. But we thought we'd give that some time. That way, we give the pressure treated boards a little time to breathe and cure in the weather. Then, next spring we'll stain it.
And here's another angle of the stoop. If you've been around this blog for any amount of time at all, you've probably seen a similar view several times over the years. But here it is with the new decking, restored railings.
And just like that, we're done. A couple little punchlist utems to do but, so minor that they're not going to be worth another post. Like I said, this wasn't an exciting post but it was necessary to put a bow on this project. Thank you so much for stopping by and hey...see you next time.
Thank you!


.jpg)


