Made at 173
A Legacy Project
Where to start with this post? This post was sitting in my draft folder for at least a 5 or 6 years. It's another one of our Legacy Projects here at House 173 wherein we tell the story of some long ago project - in this case it's about a wooden box! Let's get into it.
What are we Talking Here?
This project happened so long ago I really have no idea what year I made it. What I do recall is that I was tinkering in the workshop one day in what must have been somewhere in the late 90s, early 2000s on a day off from work. I had some router bits out and got the thinking I really should have a place to store them.
It was character that got us out of bed, commitment that moved us into action, and discipline that enabled us to follow through. - Zig Ziglar
I had recently bought a book at a used bookstore about simple woodworking projects that you could do at home. I looked around and, unfortunately, I don't think I have that book anymore - at least I can't find it. But it had things like how to make a candle box, a pipe box and some other generic wood boxes. Obviously, I saw one that would fit the purpose and thought well, let's do this one!
The Table Saw of Death
The first step of building the box was actually cutting the scrap pieces of one by.Back in '97, we had just bought 173 and cash wasn't exactly falling off the tree, so a friend of mine gave me an old table saw. When I say old - I mean old! It was belt-driven, with the saw and the separate motor mounted on an old board. When I brought it home, I built a stand for it out of leftover pieces of 2x4, a chunk of plywood and some caster wheels I had salvaged from some long-forgotten project.
The saw was built by Atlas Tools in 1954.
The rest of the story with my Atlas was that it had no safety features - at all. None. Nil. Nada. Zilch! There was no cover over the blade, no writhing knife, heck - there wasn't even a power switch! I added that the day I got it. The ol' Atlas was so devoid of safety features, my uncle (a bit of a woodworker) christened it the Table Saw of Death!
Box Dimensions
When I started making this box I really fretted over the size of the box and thus the pieces I was cutting. I was all worried about the Golden Dimension (f#@%&*g geometry - ugh!) and that stalled me for a couple days. Yep... I'm one of those that mulls stuff over in my mind trying to figure out all the necessary steps in a project. Anyway, I eventually just chose some dimensions and got started! I thought it might be easier to show you the dimensions than to describe them so, no laughing now...I drew it out!
Stock Preparation
Normally, there's a lot of hand planing and shooting board work when making a box. After re-sawing the stock (assuming it had to be re-sawn), sawed faces get planed flat and parallel with the uncut face and to the desired thickness. Then using the shooting board, all pieces get perfectly squared. But, I did none of that! Probably because I didn't even know about those things.
Woodworking is a most satisfying pastime, so varied and multifaceted you will never complete the twin processes you have undertaken: acquiring tools and learning how to use them. You have begun a lifetime pursuit. - Michael Dunbar, Essential Tools
Instead, I just cut each piece to length and that was pretty much the extent of the preparation prior to assembly.
Joints
I used rabbet joints for this box, and I think that's because the instructions in the book called for rabbet joints and probably even showed examples of how to do them. And...back in those days I was still looking for excuses to use my Craftsman router. And if my memory serves me, this was about the time (what? Maybe 26 or 27 years ago?) I bought my Vermont American router table...
And it has served me well all these years! I don't see that company around much anymore, and I kind of miss the days of driving around searching for stuff like tools....eh...progress (they say).
Cutting the Top
Once the joints were cut I assembled the parts into one solid box using my table saw. First, I set the saw blade depth so it was just shy of the thickness of the box sides. Then I adjusted the fence so I'd be cutting 2" from the box top. Then I ran the box over the blade on all 4 sides. By not cutting all the way through, the box was stable on the saw throughout the process.
Afterwards a couple passes with the ol' handsaw and I had a perfectly fitted lid. I wish I took pictures back then but you know...pre- smart phone days! Nonetheless, I grabbed this shot of the web...
 |
| homebuiltworkshop.com |
The Organizer Insert
The next step was to bring some organization to the storage. I didn't want to just chuck router bits into a box...I wanted to store them! I have no idea where I got it but I had a small piece of cedar laying around so I used that for the organizer.
I drilled some holes and labeled them for specific bits.
Simple but handy.
More Storage
To keep the router bits from just bottoming out, I just went with a couple thin wood strips for support rails.
Look at all the storage that creates!
And what else would I store in the box? Well, up to now just the packaging for the various bits... they're packed with info after all!
Finishing
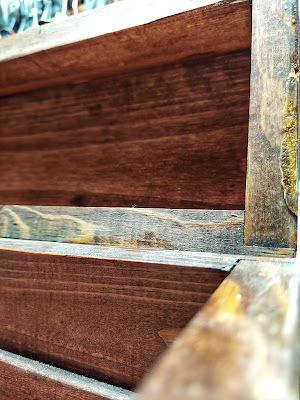
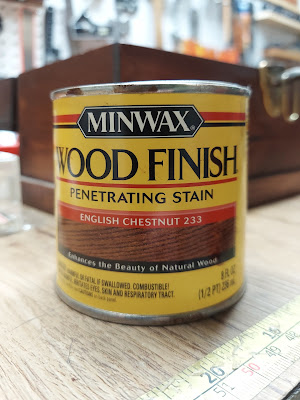
The finish was quite simple...a light sanding, then a couple coats of Minwax English Chestnut stain. Nothing fancy, and I didn't even apply poly or any other finish. Veeery simple!
A Little Hardware
All that was left was to put in a clasp to hold the box shut. Again I don't specifically remember where I got this clasp but I think I bought it specifically for this box.
As opposed to the hinges, I have a small drawer full of various hinges and I'm pretty sure I had this pair on hand!
And there you have it...my simple router bit storage box made right here at 173!
Hey, thanks for stopping by - see ya' next time!


